Appearance
LOGR GeoFence Editor Tool
Overview
The LOGR GeoFence Editor Tool is a specialized geospatial boundary management system designed for professional geofence administration and LOGR system integration. This advanced tool provides comprehensive capabilities for selecting, editing, and manipulating geofence boundaries with integrated spatial operations, real-time geometry modification, and seamless synchronization with the LOGR tracking system for enhanced operational control and boundary management workflows.
ADMIN ACCESS REQUIRED
Only LOGR admin users can access the LOGR Editor. If you cannot see this tool, please contact the GIS Section to request user access.
Getting Started
- Click the LOGR GeoFence Editor icon in the toolbar
- The tool will automatically initialize and add the LOGR GeoFence layer if not present
- The editor panel opens with available layers populated

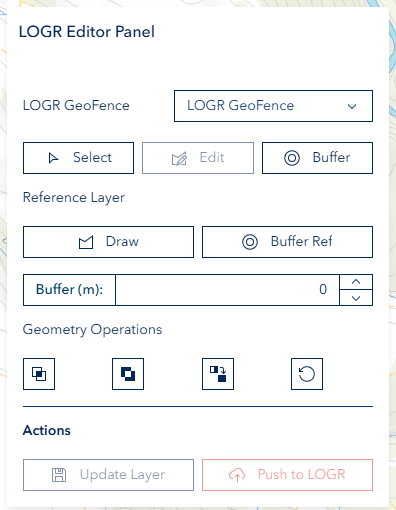
LOGR GeoFence Layer Selection
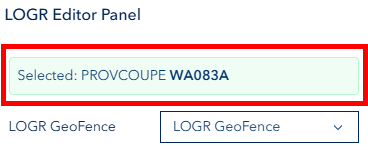
Selecting LOGR GeoFence Layer Features
- Click the "Select" button under the LOGR GeoFence layer section
- Click on the LOGR GeoFence Layer in the map
- Selected feature information appears in the green info box showing PROVCOUPE
- Click "Select" again to deactivate selection mode

LOGR GeoFence Layer Operations
Editing LOGR GeoFence Geometry
- Select a feature using the selection tool, then the Edit button becomes active
- Click the "Edit" button
- Click and drag vertices to reshape the geometry
- Click away from geometry or click "Edit" again to finish
- Remove vertices (Optional) Right-click on any orange vertex point to delete it from the polygon

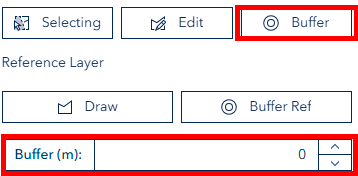
Buffering LOGR GeoFence Layer
- Select a feature from LOGR GeoFence layer
- Enter buffer distance in meters in the "Distance (m)" input field
- Click the "Buffer Target" button under LOGR GeoFence layer operations
- LOGR GeoFence geometry expands by the specified distance
Reference Layer Operations
Drawing Reference Polygons
- Click the "Draw" button under Reference Layer section
- Click points on the map to define polygon vertices
- Double-click to complete the polygon (or press ESC to cancel)

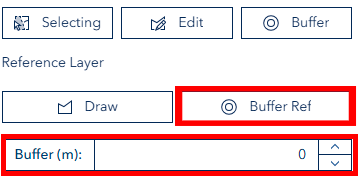
Buffering Reference Layer
- Draw a reference polygon first
- Set buffer distance in the input field
- Click "Buffer Reference" button
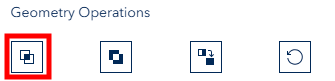
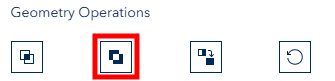
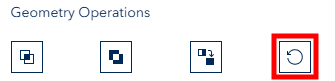
Geometry Operations
Intersect Operation
- Ensure both LOGR GeoFence and reference geometries are present
- Click the Intersect button (preserve icon)
- The result shows only the overlapping area
Subtract Operation
- Ensure both LOGR GeoFence and reference geometries are present
- Click the Subtract button (discard icon)
- Reference geometry area is removed from LOGR GeoFence geometry
Union Operation
- Requires at least LOGR GeoFence geometry
- Click the Union button (merge icon)
- All geometries are combined into a single shape
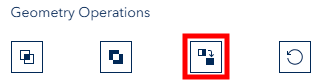
Replace Operation
- Ensure a reference geometry is present (drawn or selected from a layer)
- Click the Replace button
- The LOGR GeoFence geometry is replaced with the reference geometry
- Use this when you want to swap in an entirely new boundary shape
Reset Operation
- Click the Reset button (reset icon)
- All geometries are cleared and the tool returns to the initial state
LOGR Integration
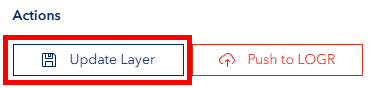
Updating LOGR GeoFence Layer
- Select a feature from LOGR GeoFence layer
- Make sure you can see the PROVCOUPE identifier in the info box
- Ensure exactly one LOGR GeoFence geometry is present
- Click "Update Layer" button
- Layer automatically refreshes to show changes
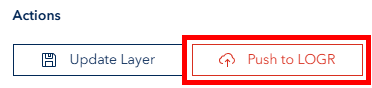
Pushing to LOGR System
CRITICAL PREREQUISITE
Ensure there is a DA (Delivery Arrangement) assigned to the Provcoupe before pushing to LOGR; otherwise the operation will fail.
- Select a feature from LOGR GeoFence layer (PROVCOUPE must be linked to a DA)
- Click the "Push to LOGR" button
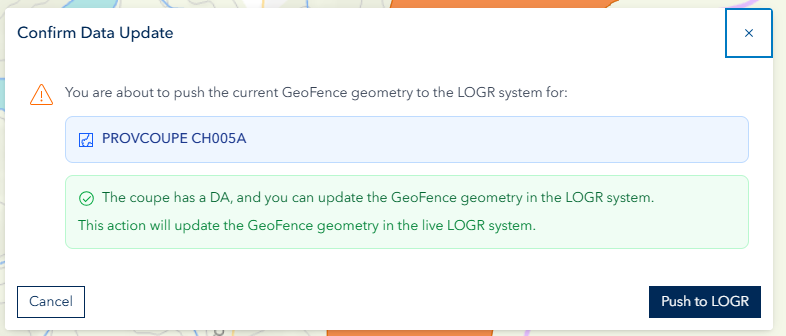
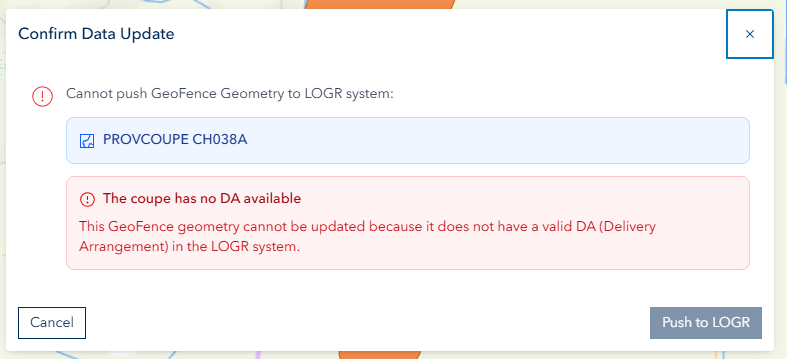
- The system automatically validates DA availability by calling the
CheckCoupeAvailableOnLogrAPI - A confirmation dialog appears showing the PROVCOUPE identifier and DA validation result:
- DA available: The dialog shows a success state — click "Push to LOGR" to confirm
- DA not found: The dialog shows a failure state — the push cannot proceed until a DA is assigned
- Click "Push to LOGR" to confirm or "Cancel" to abort
- Changes are applied to the live LOGR system
LIVE SYSTEM IMPACT
Pushing to LOGR affects the production LOGR system. Always double-check your changes before confirming. There is no undo function once changes are pushed.
Troubleshooting
| Problem | Solution |
|---|---|
| LOGR Editor not visible | Check that you have LOGR admin permissions; contact GIS Section |
| Cannot select LOGR features | Ensure the LOGR GeoFence layer is visible and loaded on the map |
| Buffer not applying | Verify the buffer distance is a positive number in metres |
| Push to LOGR fails | Ensure a DA (Delivery Arrangement) is assigned to the Provcoupe |
| Geometry operations disabled | Select a LOGR GeoFence feature first before using geometry operations |
| Update Layer button not active | Ensure exactly one LOGR GeoFence geometry is present |
| Reference polygon not drawing | Click the Draw button first, then click points on the map |
Tutorials
How to Use Geometry Operations to update LOGR GeoFence Features
How to Edit LOGR GeoFence Features
How to Push Changes to LOGR
See Also
- Advanced Editor - Standalone geometric operations for buffer, union, intersect, and difference
- Map Editor - General-purpose feature creation and editing tool