Appearance
Filter Tool
Table of Contents
- Overview
- Getting Started
- Basic Panel
- Advanced Panel
- Statistics Functions
- Exporting Results
- Tips & Troubleshooting
- Video Tutorials
Overview
The Filter Tool is a powerful data analysis and export system that enables comprehensive filtering, querying, and exporting of spatial data from visible map layers. This sophisticated tool provides dual-mode functionality with basic attribute-based filtering for simple queries and advanced SQL query capabilities for complex data analysis, combined with high-performance export functionality for seamless data sharing and external use.
Key Features:
- Dual Filtering Modes: Basic attribute-based filtering and advanced SQL query capabilities for all skill levels
- Statistical Analysis: Built-in statistics functions (Count, Sum, Average, Min, Max, Standard Deviation)
- Comprehensive Layer Support: Works with visible FeatureLayers, MapImageLayers, Group Layers, and CSV layers
- Advanced Export System: Export filtered results as Shape or KML files with complete attribute preservation
- Performance Optimization: Layer caching system for improved performance with large datasets
- Case-Sensitive Control: Toggle case sensitivity for text-based queries and precise data matching
- Real-Time Processing: Immediate filter application with visual feedback and error handling
Getting Started
Opening the Filter Tool

- Look for the Filter icon in the right panel toolbar
- Click the icon to open the filter panel
- Choose between Basic Panel or Advanced Panel tabs
What You Can Do
- Filter data from any visible layer
- Create simple attribute-based filters
- Write complex SQL queries for advanced filtering
- Export filtered results for external use
- Analyze specific subsets of your data
Basic Panel
Setting Up a Basic Filter
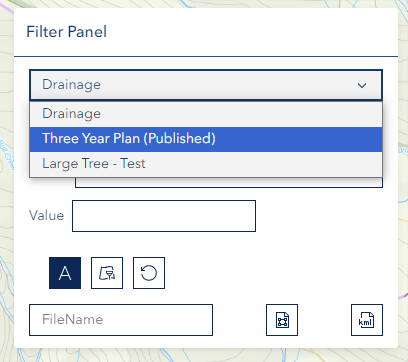
Step 1: Select Layer
- Choose a layer from the Layer dropdown
- Only visible layers will appear in the list
- Make sure the layer contains the data you want to filter
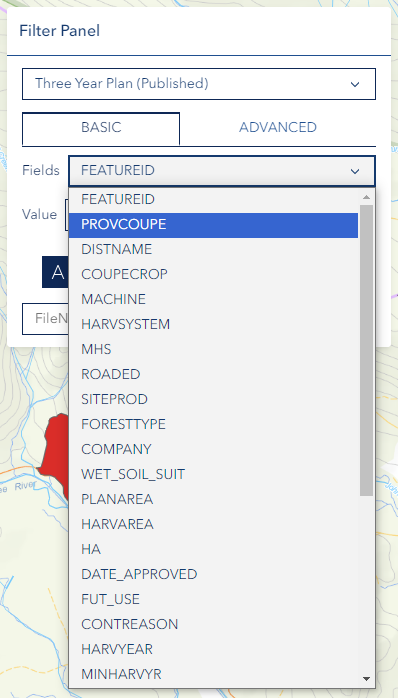
Step 2: Choose Field
- Select the Field you want to filter by
- Fields are the data attributes (columns) in your layer
- Consider the data type when making your selection
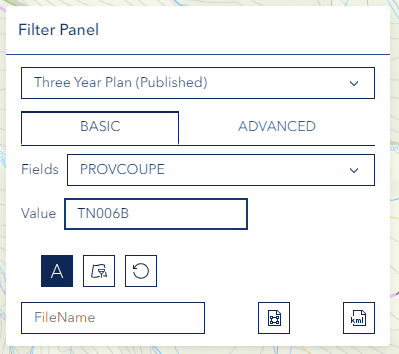
Step 3: Enter Value
- Type the Value you want to filter for
- Enter the exact value you're looking for
- Use appropriate formatting for the field type
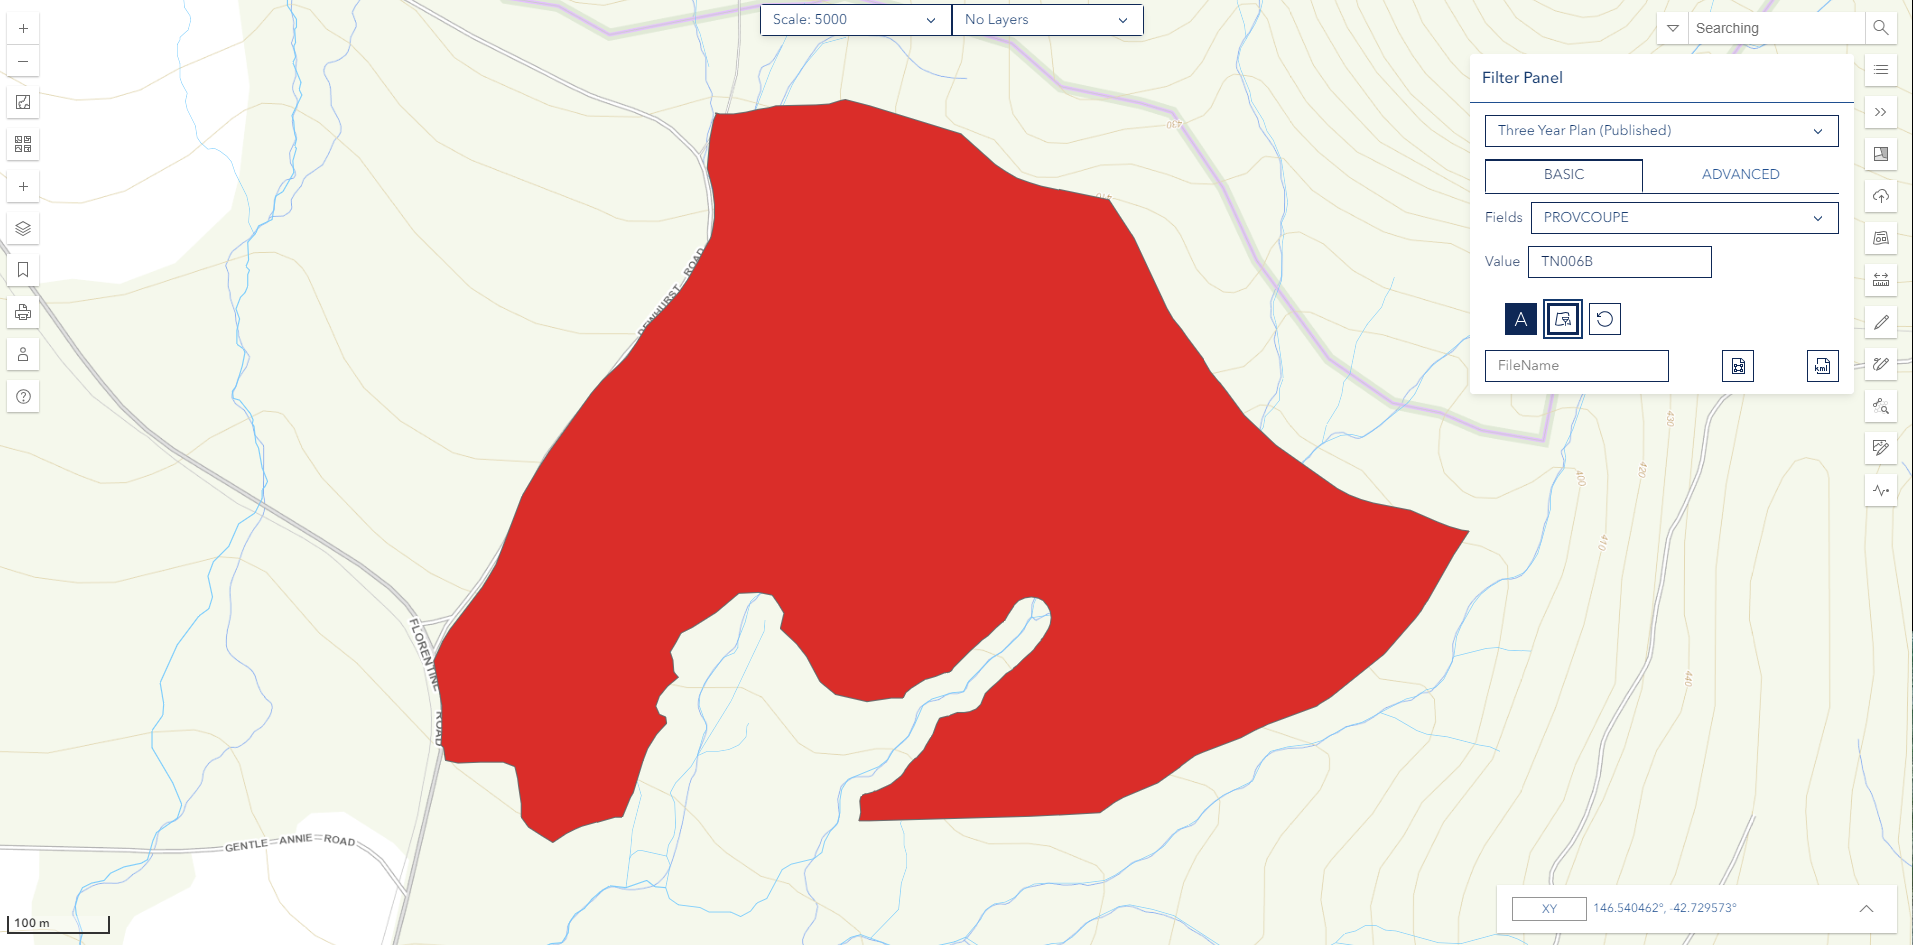
Step 4: Apply Filter
- Click the Filter button (layer-filter icon) to apply the filter
- Wait for the results to load
- The map will update to show only matching features
Basic Panel Options
Case Ignore Button: Toggle to make text searches case-insensitive (text-large icon)
Filter Button: Apply the filter with your specified criteria (layer-filter icon)
Reset Button: Clear the current filter to show all features again (reset icon)
Advanced Panel
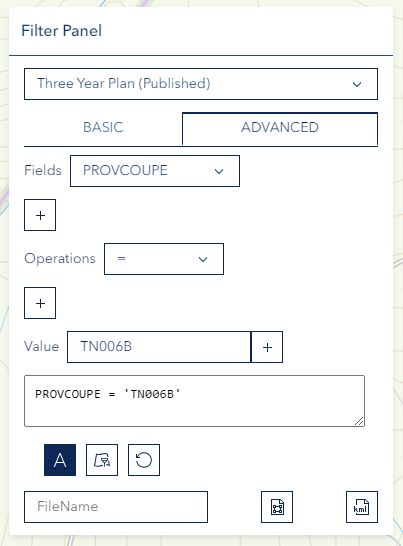
Creating SQL Queries
The Advanced Panel allows you to write custom SQL queries for complex filtering:
Available Operations:
=(equals)>(greater than)>=(greater than or equal)<(less than)<=(less than or equal)<>(not equal)%(wildcard)AND(logical and)OR(logical or)NOT(logical not)LIKE(pattern matching)IN(value in list)()(grouping/parentheses)IS(null checking)BETWEEN(range checking)
Query Examples
Simple Equality:
sql
FIELD_NAME
= 'value'
Numeric Range:
sql
AREA
> 1000 AND AREA < 5000
Text Pattern:
sql
NAME
LIKE 'Forest%'
Multiple Conditions:
sql
TYPE
= 'Harvest' AND YEAR >= 2020
Writing Queries
- Select your target layer first
- Write your SQL query in the text area
- Use proper field names and data types
- Click the Filter button (layer-filter icon) to execute the query
For detailed SQL syntax help, visit
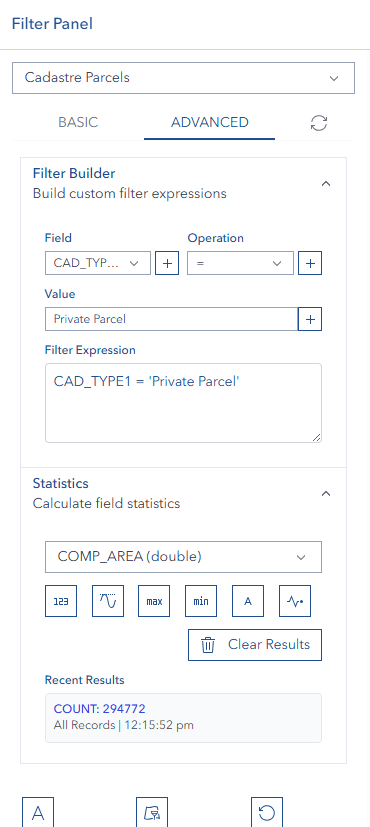
Statistics Functions
The Filter Tool includes powerful statistical analysis capabilities for numeric fields in your data.
Available Statistics
Step 1: Select Layer
- Choose the layer you want to analyze
- Ensure the layer contains numeric fields for analysis
Step 2: Select Field (for numeric statistics)
- Choose a numeric field from the Statistics Field dropdown
- This step is not required for Count statistics
- Only numeric fields (integer, double, single) are available for Sum, Average, Min, Max, and StdDev
Step 3: Calculate Statistics
Click the appropriate statistics button:
- Count - Count total number of records (works with any field type)
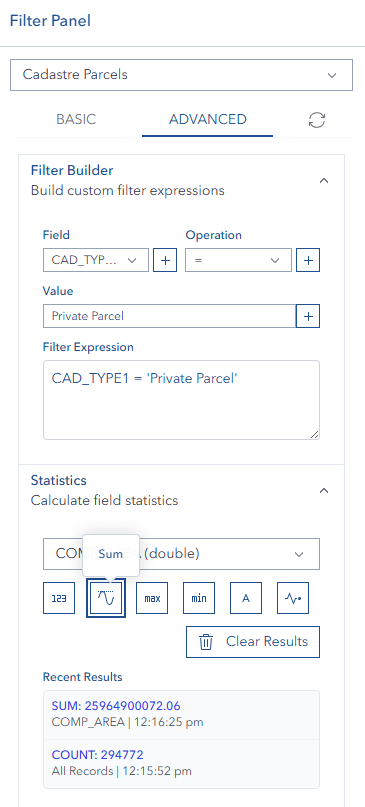
- Sum - Calculate the sum of all values in the selected numeric field
- Average - Calculate the mean/average of values in the selected field
- Max - Find the maximum value in the selected field
- Min - Find the minimum value in the selected field
- Stddev - Calculate the standard deviation of values in the selected field
Statistics Features
Recent Results Display:
- Statistics results are displayed in a compact list
- Shows the 3 most recent calculations by default
- Results include the statistic type, field name, and calculated value
- Use the "Clear Results" button to remove all statistics
Combined with Filters:
- Statistics respect active filters
- Apply a filter first to calculate statistics on filtered data only
- This allows for targeted analysis of specific data subsets
Statistics Examples
ℹ️ TIP
Use statistics to quickly analyze your data without opening external tools. Combine with filters for powerful data insights!
Exporting Results

Export Process
Step 1: Set Filename (Optional)
- Enter a custom filename in the text field
- Use descriptive names for easy identification
- Leave blank to use your username as the filename
Step 2: Choose Format
- Shape: Standard GIS format (.shp) for use in other GIS applications
- KML: Google Earth format (.kml) for viewing in Google Earth
Step 3: Export
- Click the Export button
- Wait for the file to be processed
- The file will automatically download to your computer
Export Notes
- Only filtered features will be exported
- Apply your filter before exporting
- Large datasets may take longer to process
- Files include all attribute data from the original layer
Tips & Troubleshooting
Common Issues
| Problem | Solution |
|---|---|
| No layers in dropdown | Make sure target layers are visible on the map |
| Filter not working | Check field names and value formatting |
| Export fails | Verify you have filtered results first |
| Query errors | Review SQL syntax and field names |
| Slow performance | Simplify queries for large datasets |
| Empty results | Check that your filter criteria match existing data |
| Statistics error | Ensure numeric field is selected for Sum/Avg/Min/Max/StdDev |
| No numeric fields | Layer may only contain text fields - check field types |
Best Practices
For Basic Filtering:
- Start with simple field names and values
- Use exact matches for precise results
- Check case sensitivity if text searches fail
For Advanced Filtering:
- Test simple queries before building complex ones
- Use parentheses to group logical operations
- Quote text values and use proper numeric formats
For Exporting:
- Use descriptive filenames for organization
- Choose the right format for your intended use
- Export manageable dataset sizes
For Statistics:
- Apply filters first to analyze specific subsets
- Use Count for quick feature counts on any layer
- Numeric statistics require numeric field selection
- Keep results visible to compare multiple calculations
Field Types and Formatting
Text Fields:
- Use single quotes around values:
'Forest' - Use LIKE with % for partial matches:
'Forest%'
Numeric Fields:
- No quotes needed:
1000or25.5 - Use comparison operators:
> 100
Date Fields:
- Use proper date format for your system
- Quote date values:
'2023-01-01'